You can turn parts of your building—roof, façade, even windows—into electricity-producing elements without adding bulky panels. Building-integrated photovoltaic (BIPV) systems replace conventional building materials with solar-generating components, letting you capture onsite renewable energy while preserving or improving the look and function of the structure.
This article will show how Building Integrated Photovoltaic Panels differ from rooftop solar, what design and installation choices affect performance, and what trade-offs to expect for aesthetics, cost, and energy yield. Expect practical guidance on integration, material options, and performance factors so you can decide whether BIPV fits your project goals.
Overview of Building Integrated Photovoltaic Panels
Building-integrated photovoltaic (BIPV) panels replace or become part of building elements to generate electricity while also serving structural, aesthetic, or weatherproofing functions. They vary by form factor, transparency, and integration level, and you should evaluate performance, cost, and regulatory impacts for each application.
Key Features and Benefits
BIPV systems combine electricity generation with building functions such as roofing, façade cladding, skylights, or windows. You gain on-site generation that reduces grid demand and can lower operational energy costs when sized correctly for your building load.
Performance advantages include reduced balance-of-system costs because BIPV often replaces conventional materials and can lower installation labor. Thermal and daylighting effects differ by product; semi-transparent modules can admit light while opaque cladding provides insulation and weatherproofing.
Other benefits include improved aesthetics—modules can match rooflines or curtain walls—and potential increases in usable floor area compared with ground-mounted arrays. Consider lifecycle factors: maintenance access, module replacement, and integration with HVAC or battery storage to maximize value.
Types of Building Integrated Photovoltaic Systems
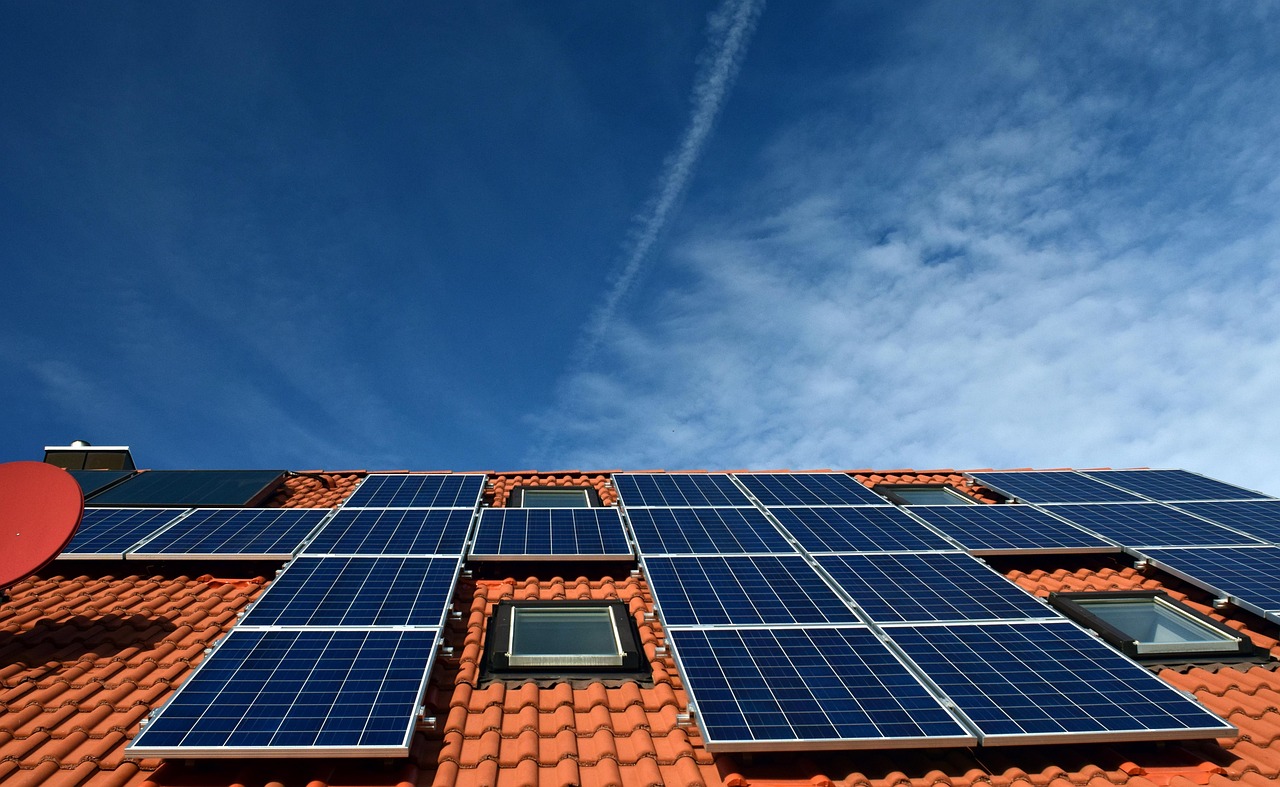
BIPV products fall into clear categories: roof-integrated (tiles, shingles), façade systems (curtain walls, cladding), and fenestration (solar glazing, semi-transparent modules). Each type uses different PV technologies: crystalline silicon for high efficiency, thin-film for flexible or curved surfaces, and emerging perovskite or tandem cells for higher transparency or color tuning.
Installation modes vary: fully structural BIPV replaces the envelope element, while non-structural BIPV is applied onto existing substrates. You should note electrical configurations too—monolithic modules for uniform façades, or string/inverter layouts for segmented roof areas. Fire ratings, wind uplift, and water tightness requirements differ by type and must meet local codes.
Select technology based on your priorities: efficiency and lifespan for roofs, light transmission and U-value for windows, and weight or curvature for canopies and walkways.
Applications in Modern Architecture
Architects and owners use BIPV in new construction and retrofits to meet net-zero targets, improve façade performance, and achieve design differentiation. You’ll find BIPV on commercial curtain walls, sloped residential roofs with solar shingles, parking canopies that produce power and provide shade, and semi-transparent atrium glazing that balances daylight and generation.
Urban projects often use façade-integrated arrays where roof area is limited. In high-performance buildings, BIPV integrates with energy management systems, demand response, and storage to smooth generation profiles and reduce peak loads. For heritage or tightly regulated sites, discrete BIPV products can preserve visual character while adding renewable capacity.
When planning application, address permitting, structural reinforcement for added weight, and access for cleaning or replacement to ensure long-term performance.
Design, Installation, and Performance Considerations
You will balance aesthetics, structural integration, and energy yield while meeting code and maintenance needs. Decisions about where and how to integrate panels, expected efficiency losses, and lifecycle costs determine whether the installation meets your performance and financial targets.
Integration Methods for New and Existing Buildings
For new construction, specify BIPV materials—roof tiles, curtain walls, or solar glazing—during design so the PV elements become part of the envelope and reduce separate cladding costs. Coordinate with the architect and structural engineer to place load-bearing supports, wiring chases, and ventilation paths before finishes go on. Document thermal bridging, fire ratings, and air/water barrier continuity in the contract documents.
For retrofits, use BAPV where attachment points, flashings, and curb details are simpler and less disruptive. Evaluate roof condition, slope, and remaining service life; if under five years, replace roofing before installing integrated modules. Use mounting systems that preserve flashings and allow panel removal for maintenance. Always verify local zoning and building-code requirements for altering façades or glazed assemblies.
Checklist (minimum pre-installation):
- Structural assessment and uplift calculations
- Fire and egress compliance
- Electrical service capacity and inverter location
- Waterproofing and flashings plan
Efficiency Factors and Optimal Placement
Position panels to maximize incident solar irradiance: orient façades and pitched roofs to true south (in the Northern Hemisphere) or true north (in the Southern Hemisphere) where possible. Tilt angle should match latitude for year-round energy balance, or be optimized seasonally for peak demand. Avoid shading from nearby trees, parapets, or HVAC equipment; partial shading can reduce array output disproportionately.
Select module types by application: monocrystalline cells for limited area and high efficiency; thin-film or semi-transparent modules for glazing where light transmission matters. Account for temperature coefficients—modules on roofs heat up more and produce less than test-conditions ratings. Include mismatch losses, wiring resistance, and inverter efficiency in yield modeling. Use monitoring and string-level optimization (microinverters or power optimizers) to mitigate shading and maintain per-module performance.
Cost Analysis and Return on Investment
Calculate installed cost per watt including modules, inverters, structural attachments, labor, design, permits, and roof remediation. For BIPV, factor in the avoided cost of conventional cladding and potential higher design and glazing costs. Compare lifecycle costs using a 20–30 year horizon and include operation, cleaning, occasional repairs, and replacement of inverters.
Estimate energy production with modeled irradiance, degradation rate (typically 0.5–1%/yr), and system losses to produce annual kWh. Convert to monetary savings using your utility rate or time-of-use values. Compute simple payback, net present value (NPV), and internal rate of return (IRR) using realistic incentives and financing costs.
Quick decision table:
- High upfront budget, long-term ownership: BIPV can improve building value and aesthetics.
- Short-term ownership or low roof life: BAPV with minimal roof changes often yields faster payback.
- Significant shading or complex façades: use module-level power electronics to protect yield.


Leave a Reply